Chapter 29 Preparing Training Containers, Pots, and Slabs For Planting
29.1 Preparing Plastic & Ceramic Training Containers
Training pots should have at least one large drainage hole in the lowest point of the pot. To keep the soil in and the pill bugs out, wire a square of 1/8-inch plastic mesh screen into the bottom of the pot.
Don’t buy small pieces of over-priced mesh from a bonsai specialty store. Larger sheets are available for a much lower price from a needlework or crafts store.

Plastic mesh over pot drainage holes, held in place with looped wire. Link to original image
Personally I prefer to use drywall tape, which is 2-3’ wide fiberglass mesh, with adhesive on one side. A $5 roll will be enough to screen dozens of pots.
1. !
2. 
3. 
4. 
Covering drainage holes with drywall tape. 1. A roll of drywall tape. 2. Two pieces of tape, ready for use. 3. Covering the hole with the first piece. 4. Place the second piece at an angle so the threads form smaller openings. Even if the tape shifts slightly, it will still cover the holes. Once soil is added, it will stay in place. Original photos by Dan Johnson.
Ideally show containers also have several smaller 1/8-1/4-inch diameter holes through which tie-down wires or strings can be threaded. The traditional reason for tying a tree down is to prevent delicate hair roots from being damaged by the tree moving in the pot. Research has shown that some movement actually stimulates and strengthens roots. This does not eliminate the need to anchor trees though. Large trees in small shallow containers are at risk of being blown or knocked out of their containers. Slant and cascade styles can be levered out by their weight alone.
Wire that is 2 mm or 3 mm in diameter is fine for anchoring trees into their containers. Do not worry if the wire is old or kinked; I recycle longer pieces of wire routinely. Insulated copper wire scrounged from house or commercial wiring projects also works very well.
29.2 Preparing Slabs

A group planting on a rock slab. The trees are held in place by wires anchored to the surface with epoxy or superglue. The soil is contained by a layer of muck soil that forms a berm around the edge of the slab. Link to original image..
29.2.1 Attaching Tie-Down Wires
Manufactured concrete and ceramic slabs usually have pre-drilled holes for tie-down wires. Solid stone slabs will need to have tie-down wires attached.
One option for thin rock slabs is to drill small pilot holes using a masonry bit. Alternatively wires can be attached using baking soda mixed with cyanoacrylate glue (super-glue).
Do this outdoors; the fumes are very toxic.
- Place a small pile of 1/8th teaspoon of baking soda on each spot where a wire will be attached.
- Cut an 18-inch piece of 2 mm aluminum wire for each pile of baking soda. Bend the wire in half, and place the bend point in the middle of the pile of baking soda.
- Place 2-3 drops of cyanoacrylate glue on top of the wire in the baking soda. It will foam up and generate fumes. Within a minute the reaction will stop, and the baking soda/glue mix will harden, holding the tie-down wire in place.
- If a wire does not anchor, move to one side of the failed anchor, add a bit less baking soda, and try again.

Gluing ties to a rock
Anchoring a tie wire to a rock with superglue. 1. Bend the wire you will use into a U shape, and slightly angled so it sits flat on the rock surface. 2. Pour a small amount of baking soda onto the surface of the rock. 3. Add 1-2 drops of glue. 4. Within 5 minutes the glue will have solidified, anchoring the wire to the rock. Two warnings when using this technique. First, do not use CA glue if the air temperature is below freezing. Second, do not try to use glue that is more than 12 months old. CA superglues degrade quickly after they are manufactured, and old glue often fails to bond. The short expiration time is why, in my opinion, it is better to plan ahead and anchor wires using 2-part fast-setting epoxy instead. Like everything else though, that’s just my opinion. Original images by Dan Johnson.
29.2.2 Building a Soil Berm With Muck
Soil will not stay on a rock or slab on its own. It needs to be held in place using walls of muck, which is a sticky mixture of clay, peat, sphagnum, and manure. There are several recipes for muck on this page.
Usually the outside surface of the muck berm is covered with moss, star grass, or some other small ground cover that keeps it from washing away over time. Muck that contains peat moss is susceptible to hydrophobic dry-down. It is good practice to watch any muck constructions to make sure they are not showing signs of drying out and not rehydrating properly. If in doubt, consider watering the muck once or twice with water plus a surfactant or soil wetting agent.

An example of muck soil in action. This bald cypress (Taxodium distichum) forest bonsai is on display at the National Bonsai & Penjing Museum at the United States National Arboretum. The edges of this planting are anchored in place using muck soil covered by moss. Link to original image.
Muck is rolled out in long cylinders about 1 inch in diameter (you can make them on wax paper if that makes handling easier), placed where needed, and pressed down. Higher walls should be built up incrementally rather than trying to make them larger than 1 inch at a time.

Raw muck
A block of 2-part muck (clay plus peat), which does not contains cow manure. I made this mix specifically for photographing the prep and placement process. It handles essentially the same as muck with manure but is not quite as sticky or as dark. Original images by Dan Johnson.

Chunks of muck
Rough chunks of muck I pulled from the block to shape. In practice, it is hard to handle and shape a lump of muck larger than a chicken egg. Most people find it is easier to build up structures more slowly with smaller amounts of muck than to try and handle larger amounts all at once. Original images by Dan Johnson.

Rolled muck
The chunks of muck from the previous photo have been rolled out to form ropes about 3/4" in diameter. Original images by Dan Johnson.
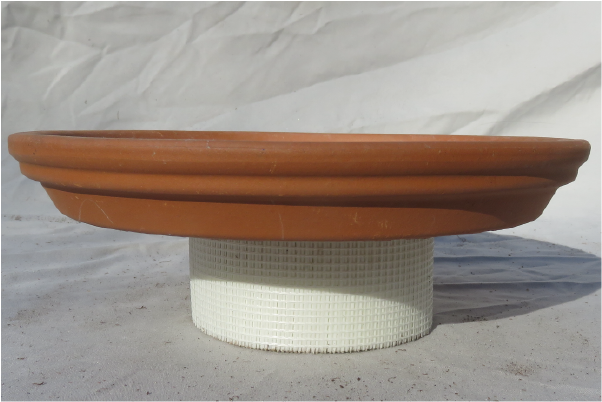
I have provided photos illustrating two examples of how muck can be used to create or modify a bonsai container. The first, simpler example is an unglazed plain red terra cotta drainage tray. I used a masonry drill to add drainage holes to this tray. The goal is to convert the tray into a container that could sustain a Japanese maple, American hornbeam, or trident maple grove.
The second example is another drainage tray with an olive glaze and no drainage holes. For this example, I left some potential defects that, if they are not corrected before I plant a tree in the container, are going to become bigger problems later.
29.2.2.1 Muck Example 1: The Red Terra Cotta Tray
1. 
2. 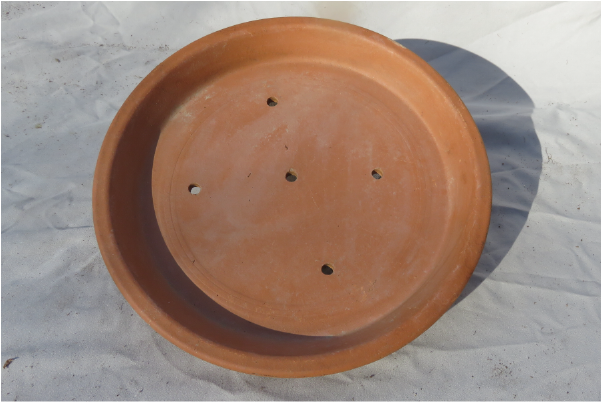
The unmodified red terra cotta tray. Image 1. Side view. Image 2. Top view. Original images by Dan Johnson.
3. 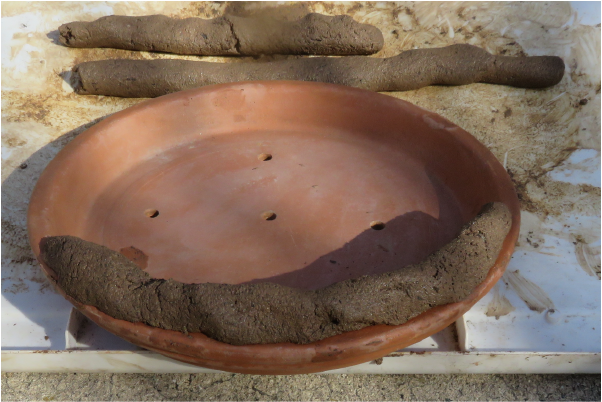
Rolled muck has been placed on the top edge of the tray. It has not yet been pushed down or feathered onto the tray lip, so could be dislodged very easily. Original images by Dan Johnson.
4. 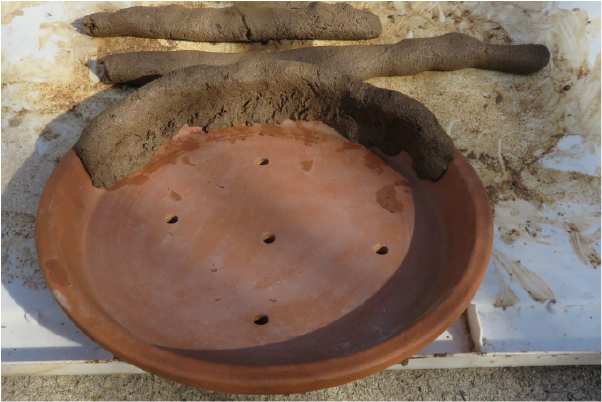 .
.
5. 
6. 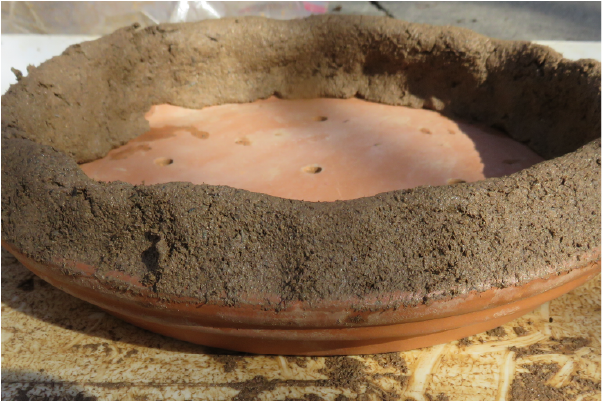
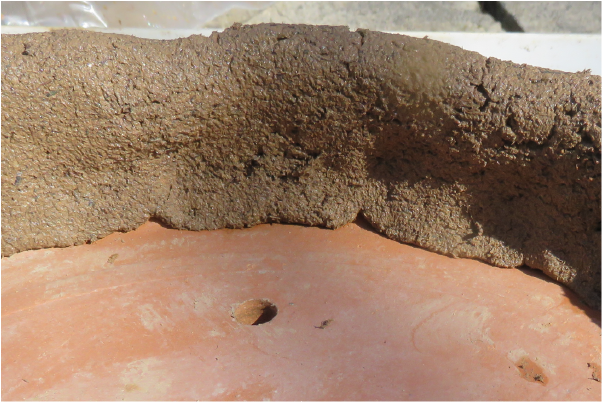
The muck has been smoothed over on the inside (Images 4, 5) and outside (Image 6) so it forms a more adherent, cohesive wall around the container. Original images by Dan Johnson.
7. 
8. 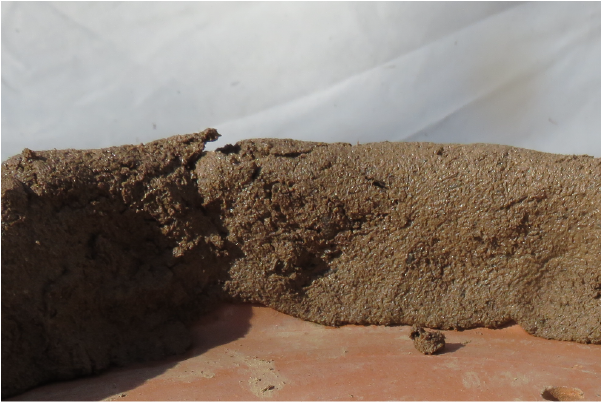
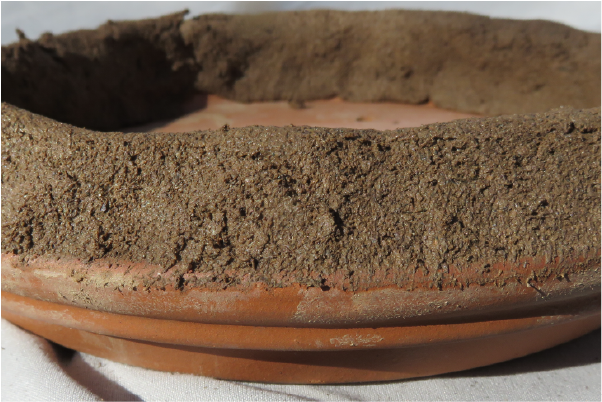
Close-up of the smoothed exterior face (Image 7). The central space will be filled with soil mix, then the outer face planted with moss, micro-ferns, or star grass. This gap(Image 8) needs some additional muck to make it stable. Original images by Dan Johnson.
To test this muck installation, I did not fill it with soil, but left it in the garden shed to dry out. The muck cracked but did not fall away on its own, even after 3 months.
29.2.2.2 Muck Example 2: A Glazed Olive Green Tray
The second example aims to create a hill-and-valley effect, where the tree is planted on “higher ground” in the space surrounded by muck, and hangs over a lower “valley” with smaller plants or stones. I have left some obvious defects in place to show how they appear.
1. 
2. 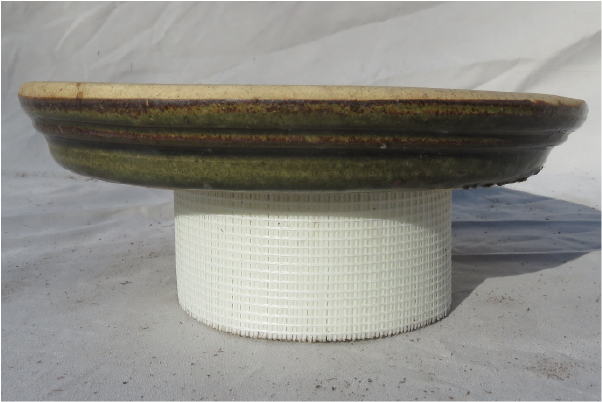
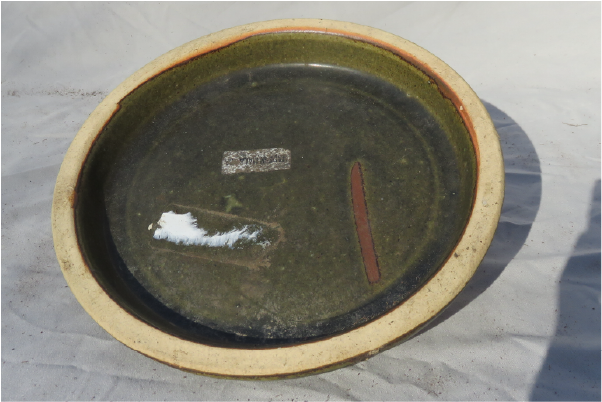
This olive green ceramic tray was sold originally as a drainage tray, but by adding muck, we can turn it into a bonsai container. This container does NOT have drainage holes. This is not a major problem for flat rock slabs, but there is a deep enough lip on the dish to allow for standing water. Original images by Dan Johnson.
3. 
4. 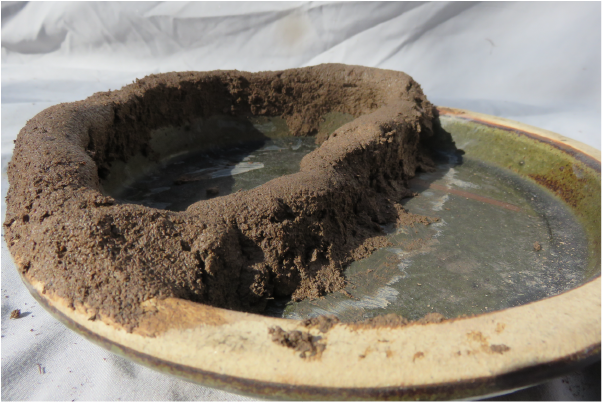
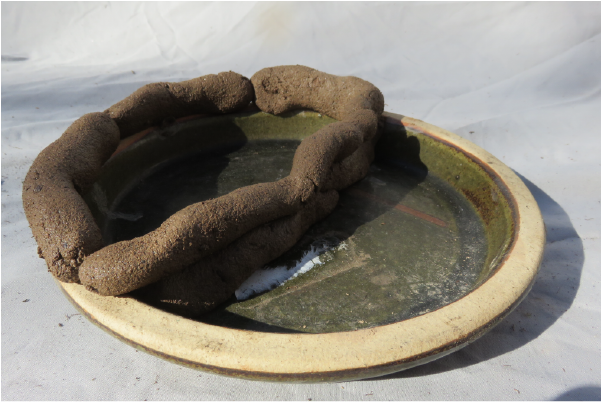
Image 3. The rolled muck has been placed and is ready for shaping. Image 4. After the muck has been smoothed over. Original images by Dan Johnson.
5. 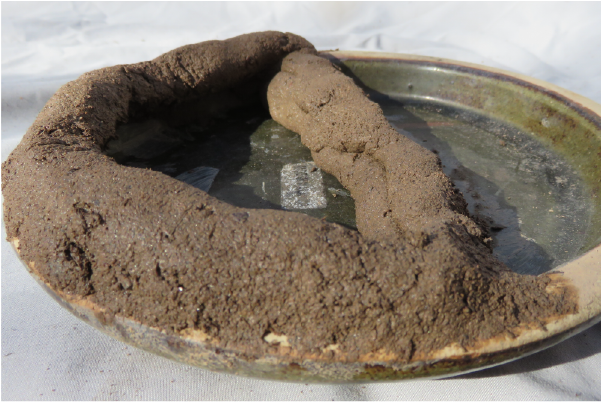
Image 5. One of the two corners where the higher elevation area will transition to the lower plantings. Transition points like this are where large blobs of unsupported muck are more likely to fail. One way to provide additional support would be to embed a small rock in the muck in this corner. The muck becomes mortar instead of the primary load-bearing material. Original images by Dan Johnson.
6. 
7. 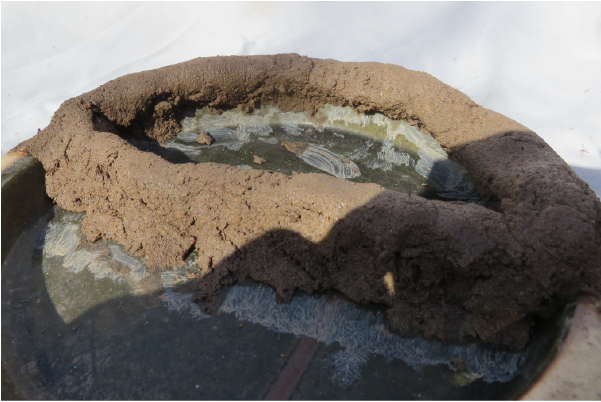
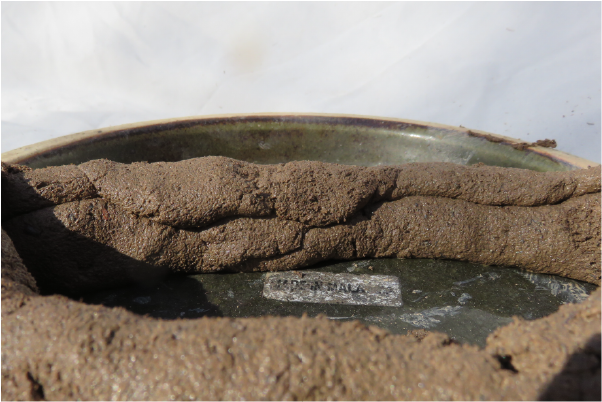
Examples of poorly applied muck. None of these are guaranteed break points, just points where the muck might fail to do its job. Addressing them now could eliminate the need to make repairs later. Image 6. The back side of the dam across the middle of the tray has not been smoothed together. Very wet soils could push through a weak spot. Image 7. While they are hard to see, there are several problems visible here. First, there is a break in the dam wall, just before it disappears into the shaded area. Second, the dam in the shaded area is not smoothed down so it adheres to the tray well. Third, the upper chamber has an overhanging lip of material that will need to be thinned out to avoid having too little space for soil. Original images by Dan Johnson.